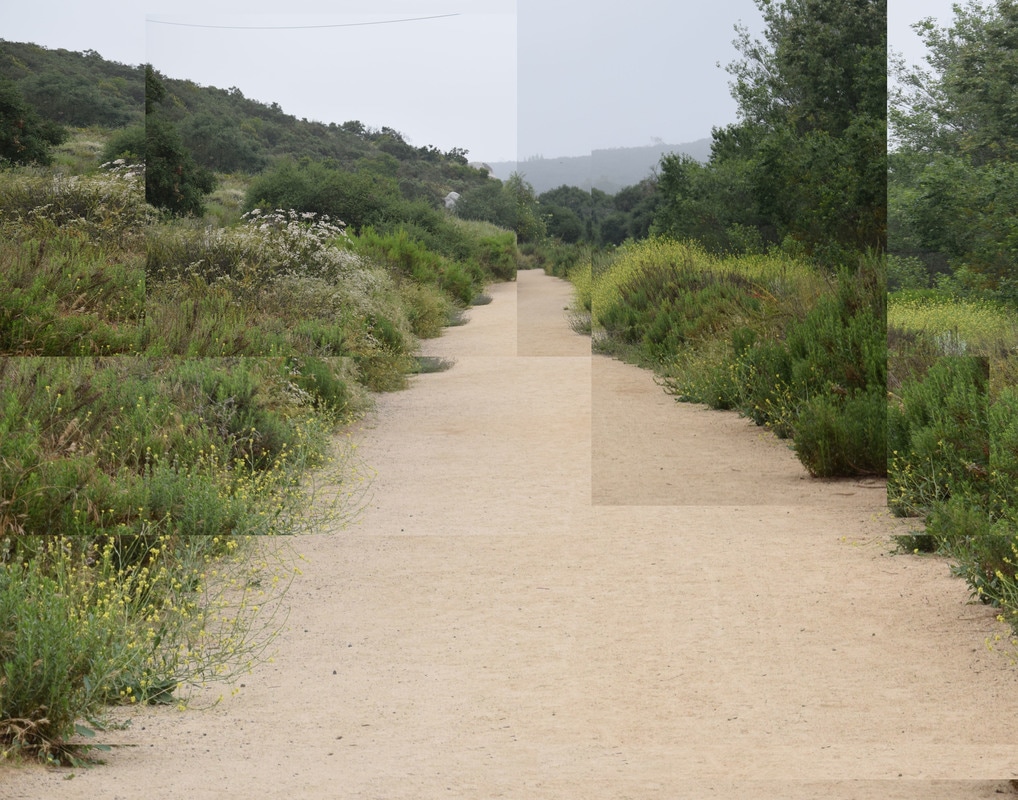
 Leading Line 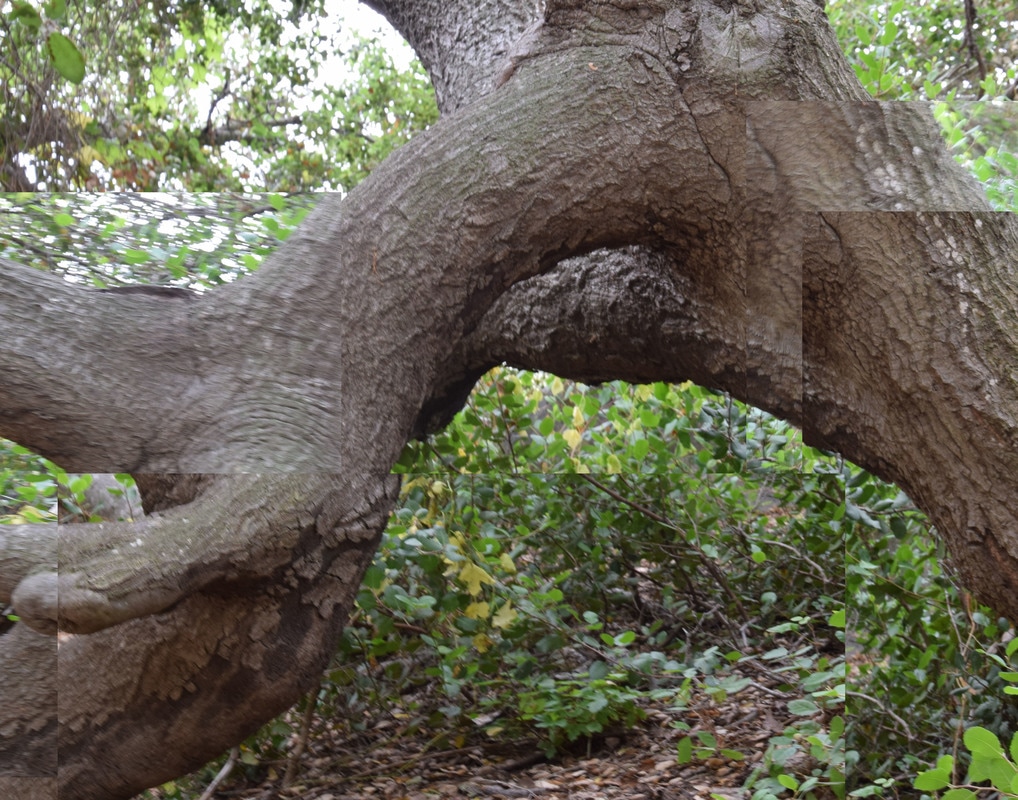 Born in Bradford, England, in 1937, David Hockney attended art school in London before moving to Los Angeles in the 1960s. There, he painted his famous swimming pool paintings. In the 1970s, Hockney began working in photography, creating photo collages he called joiners.
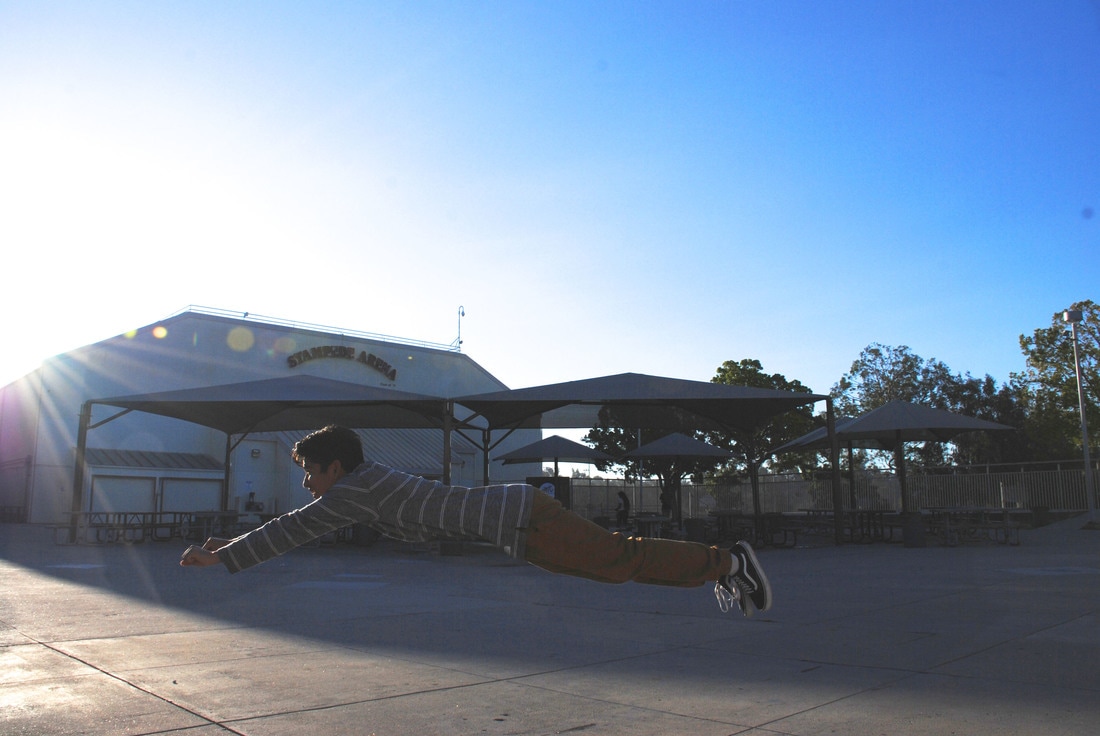
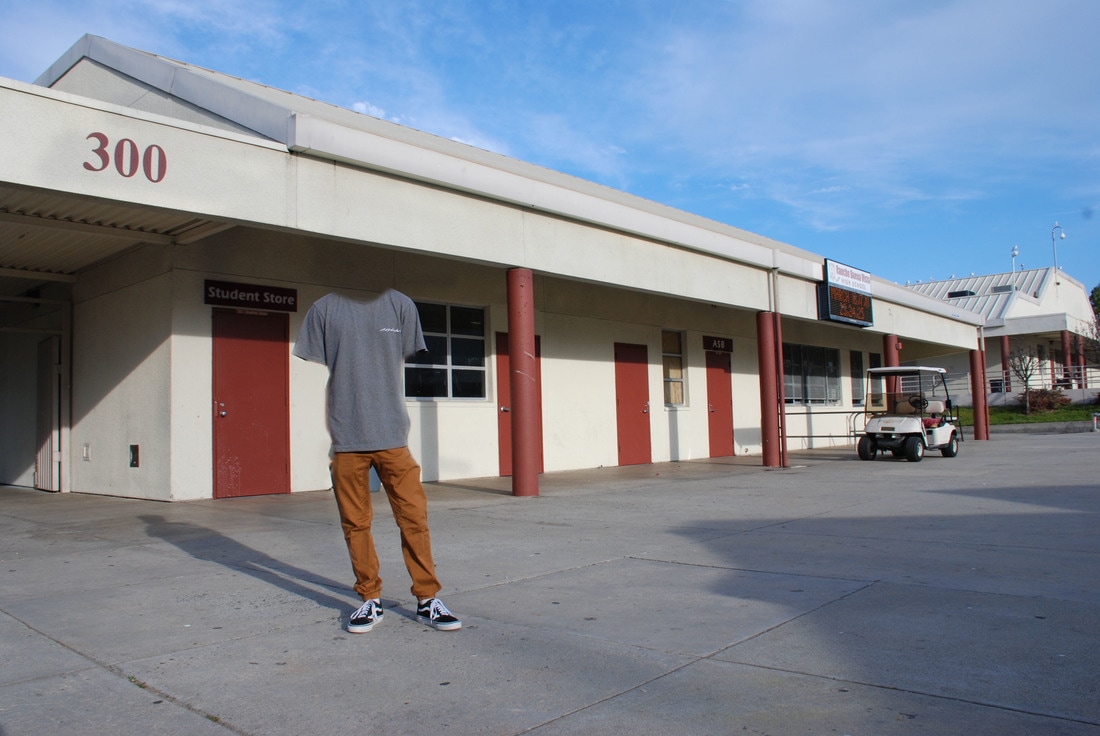
To create this photo style I opened photoshop and created an 11x14 and 300 resolution file. From there I placed my different images onto the file to create a layered collage affect. I had to transform my different pictures in order for them to al match up in a way that it keeps the main focus and subject of the photo collage.
0 Comments
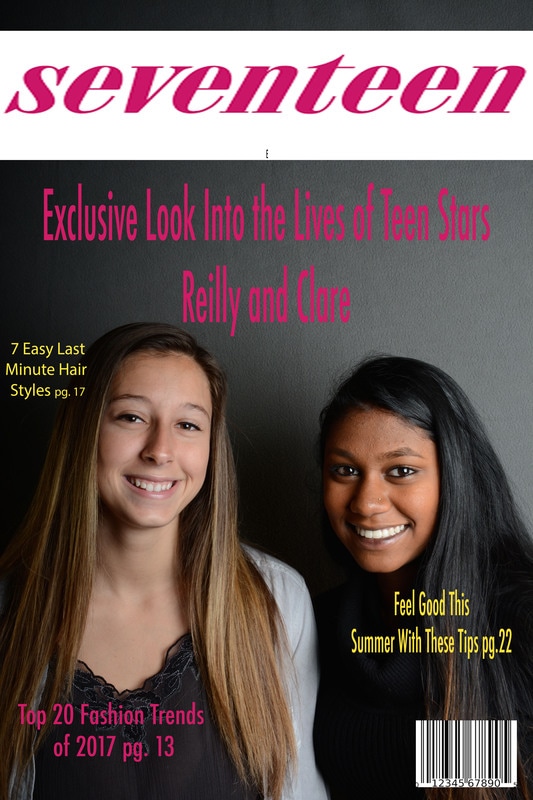 I chose seventeen magazine. because it is one of thew most popular teen magazines present today. To emulate the style of the magazine for the text I put many of the subtexts as tips for fashion or hair which that magazine often does. Then for the cover I put the headline as a look into "celebrity lives" like the actual magazine focuses on. I used the font style of Myriad Pro Regular. I used font colors of yellow and pink to emulate the "girliness" of this magazine. I had Maddy just take a picture of Reilly and I standing up in front of the back drop. To create this whole photo i placed the seventeen magazine logo, but headlines, and a bar code. Strobe lights have lightning fast recycle times, so the photographer never has to wait for the flash to catch up. They just take the picture and the strobe flashes without extra work involving creating the flash. A modeling light is a continuous light source located in proximity to a flash tube. The purpose of a modeling light is to allow a photographer to visually a sense of the lighting effect the flash, when it fires, will create. A soft box is a type of photographic lighting device. It diffuses the light into a pleasing soft, even light. When used properly, it reduces harsh shadows. A reflector is an improvised or specialised reflective surface used to redirect light towards a given subject or scene.The best method I have found for using a white reflector is to move it back and forth and watch the light on your subject. The change might be subtle, but you’ll be able to find the right angle for your reflector with a little practice.Although it sounds obvious, if you’re having a hard time finding the reflected light on your subject, make sure that light is actually hitting the reflector. A gray card is a middle gray reference, typically used together with a reflective light meter, as a way to produce consistent image exposure and/or color in film and photography. A gray card is a flat object of a neutral gray color that derives from a flat reflectance spectrum. A radio trigger system produces a flash at the moment the camera's shutter is open.
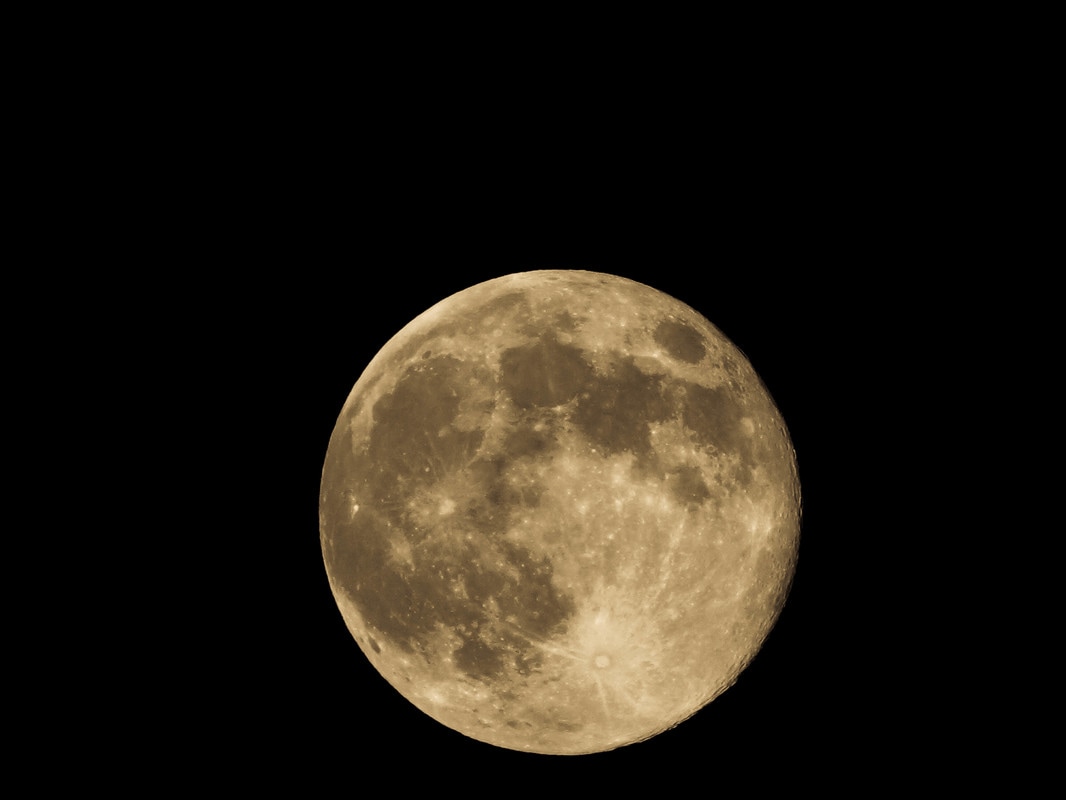
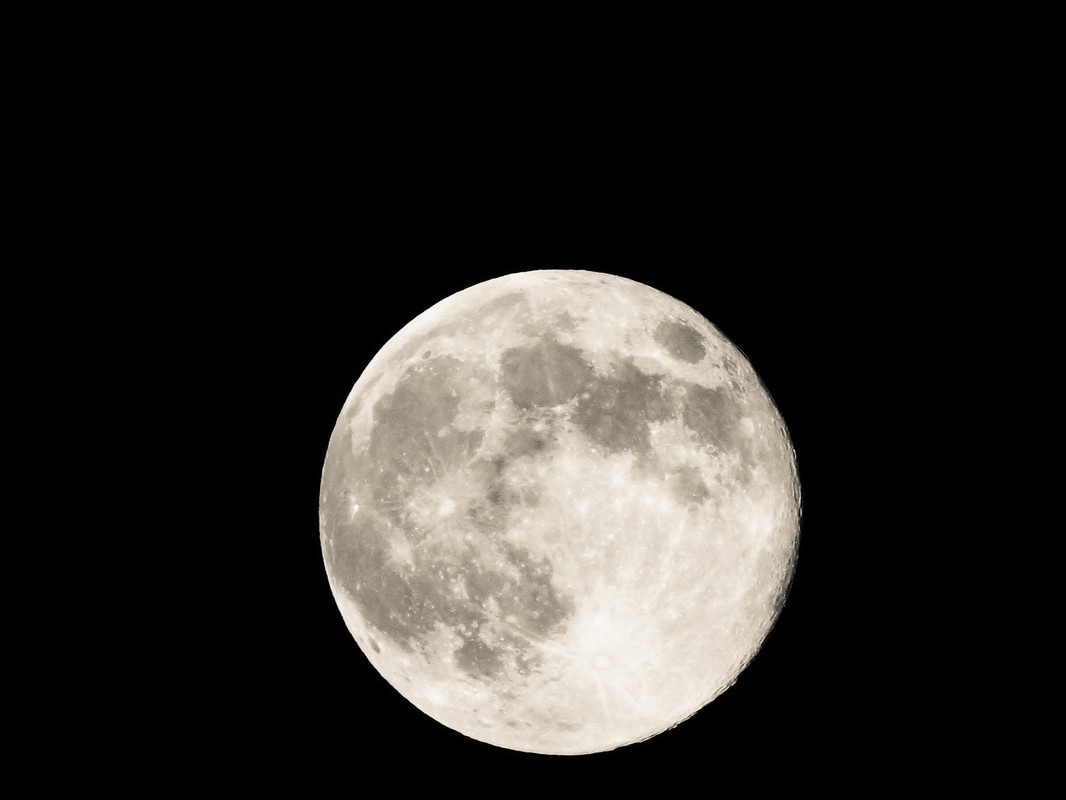
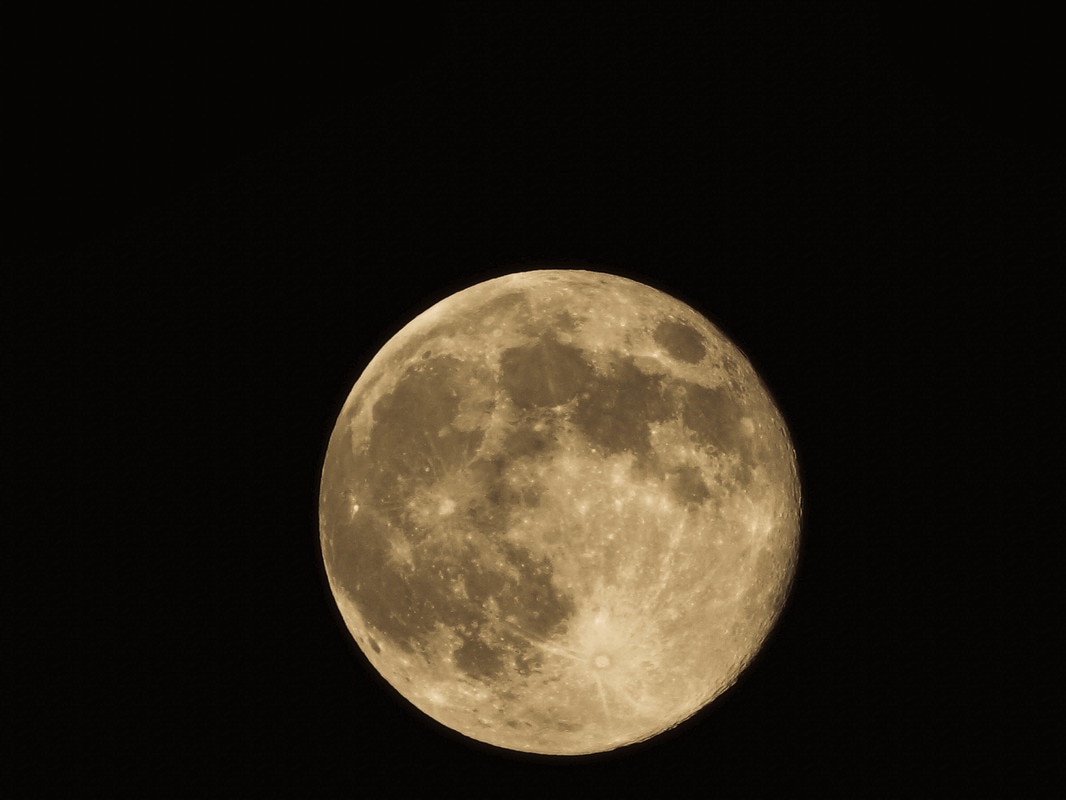
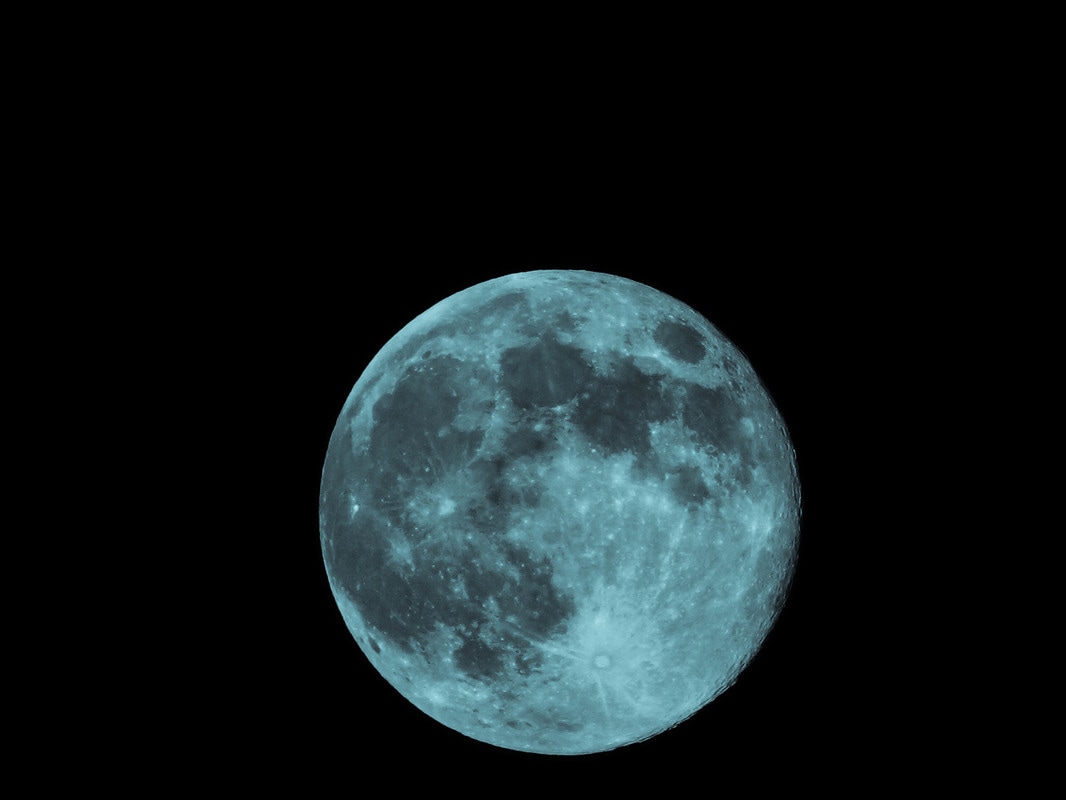
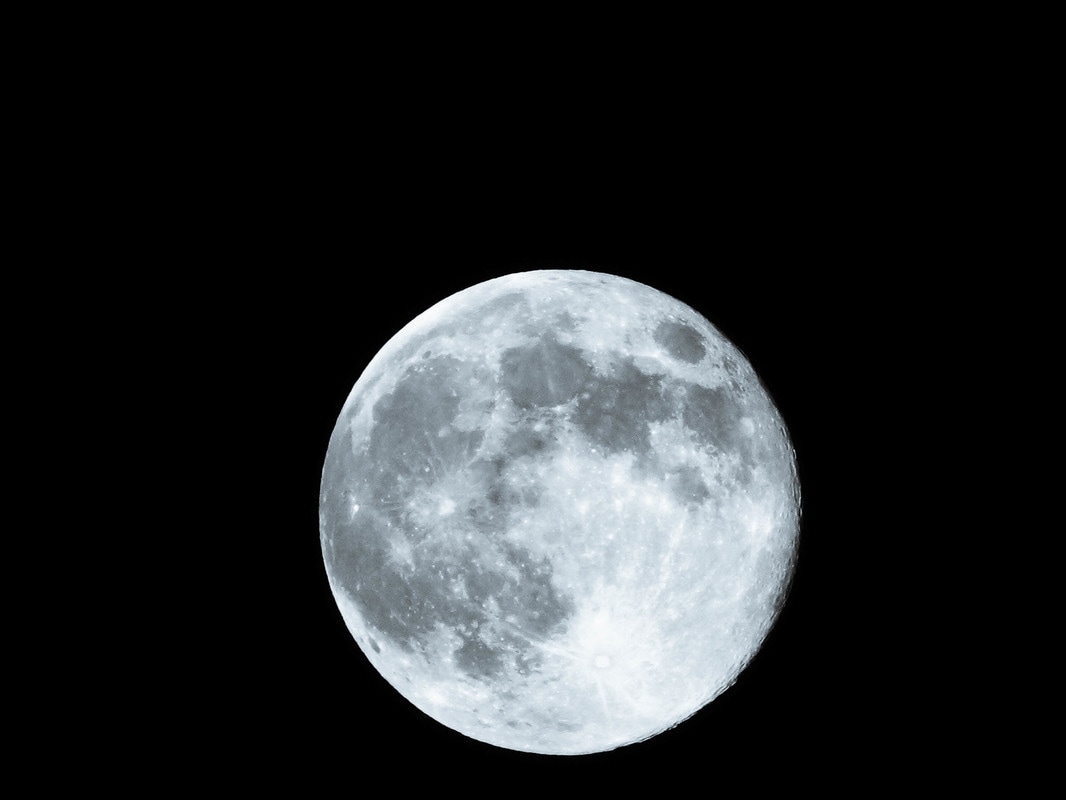
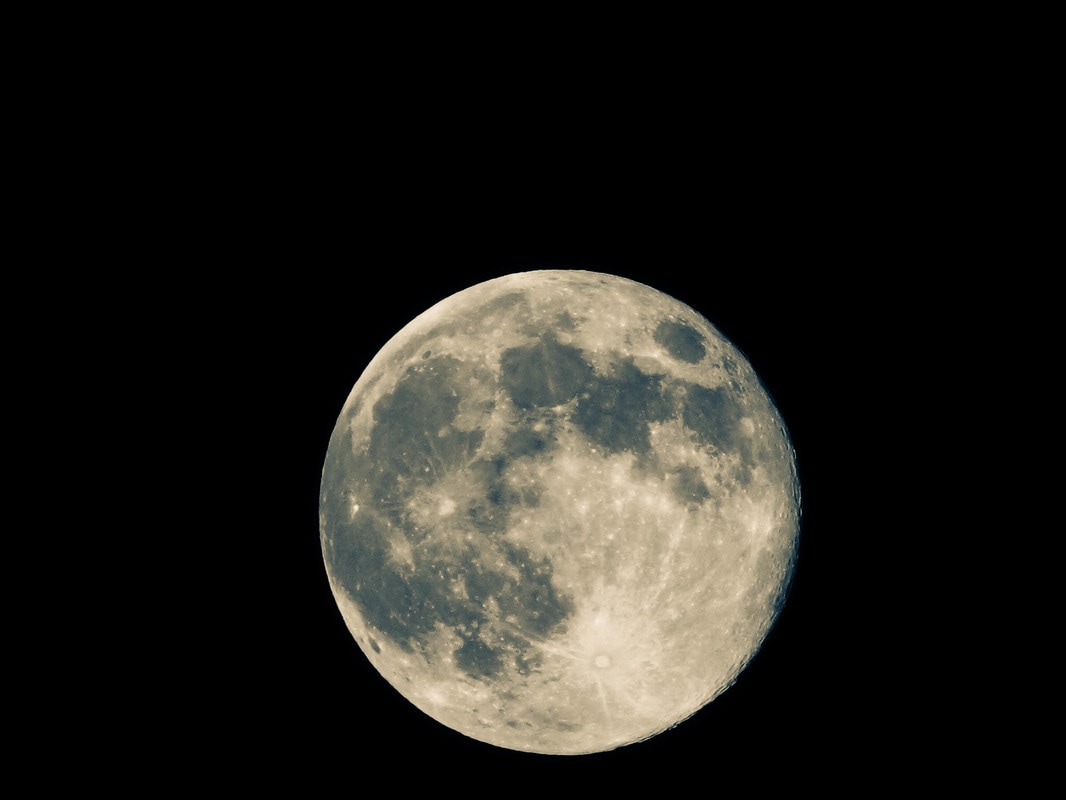
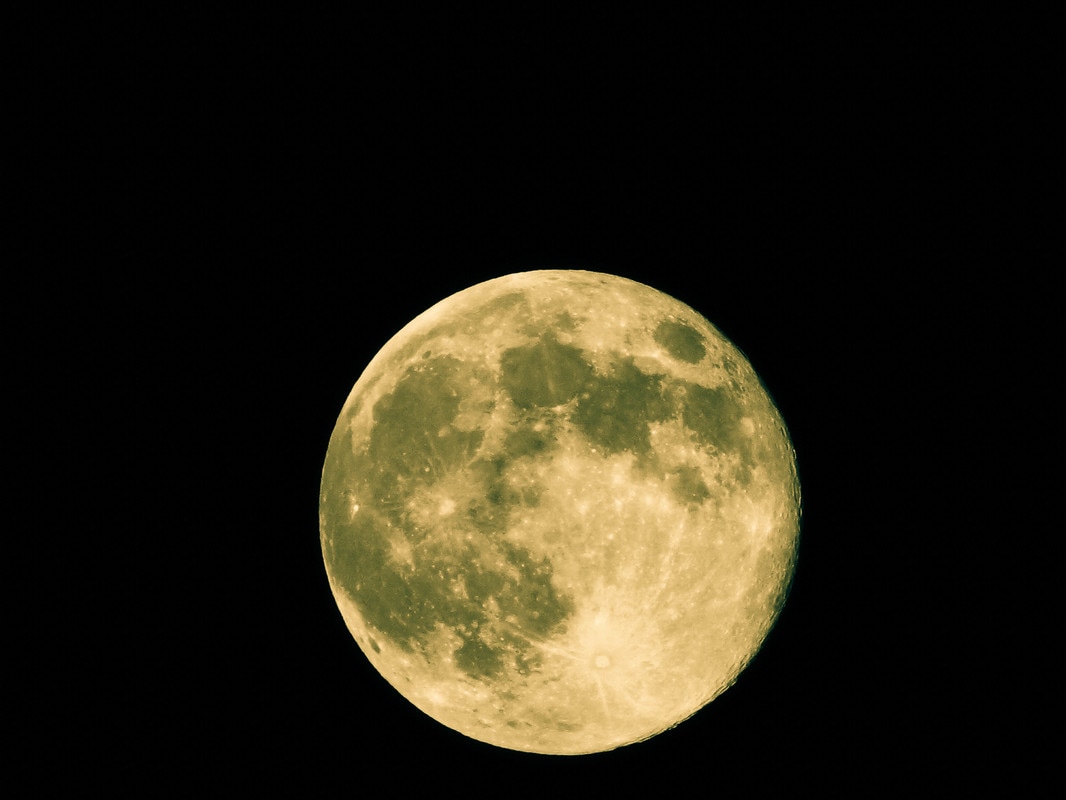
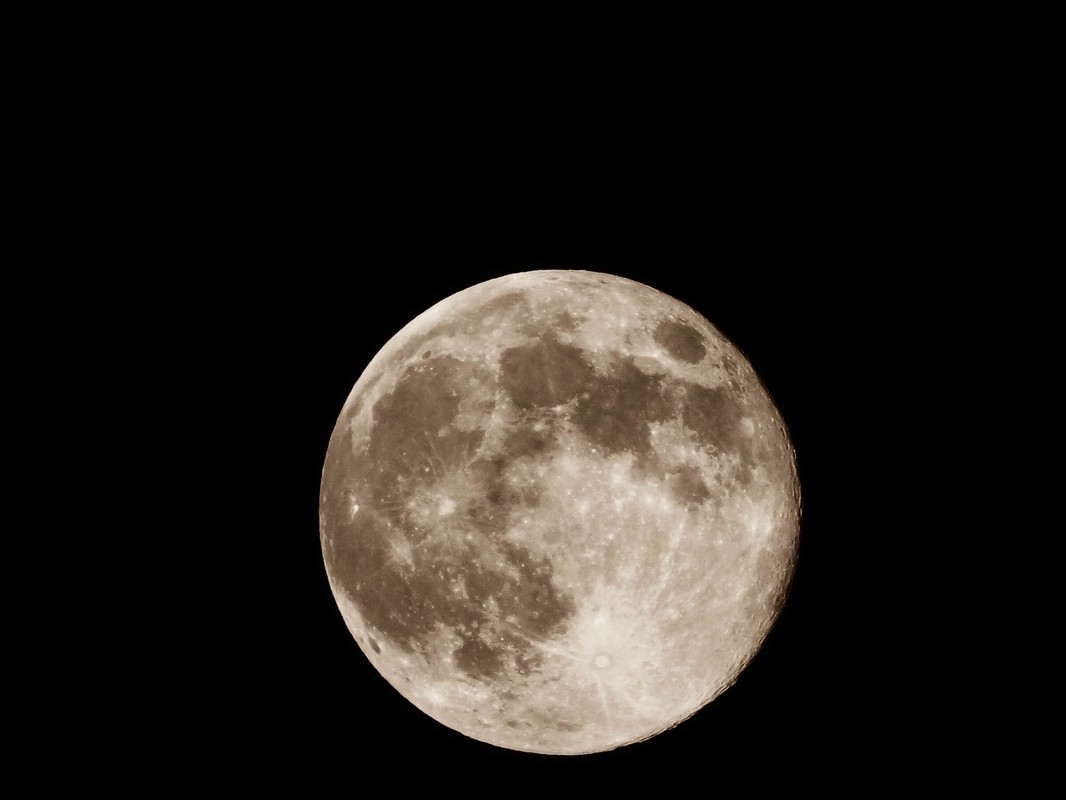
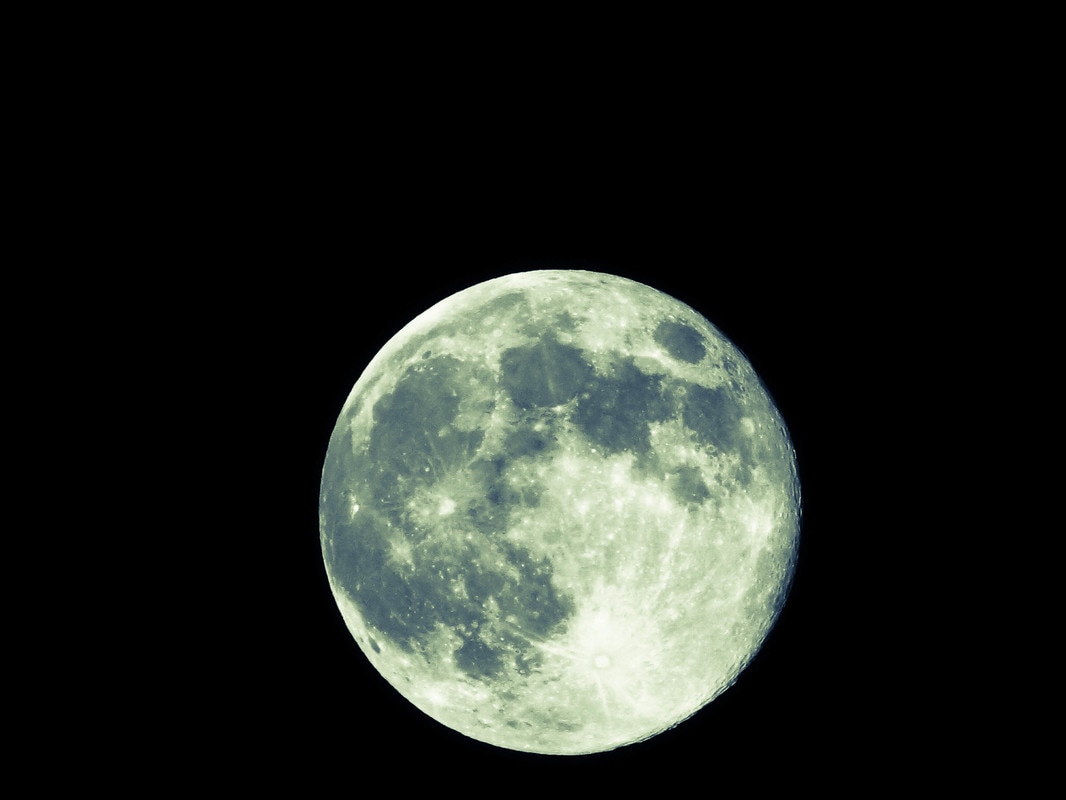
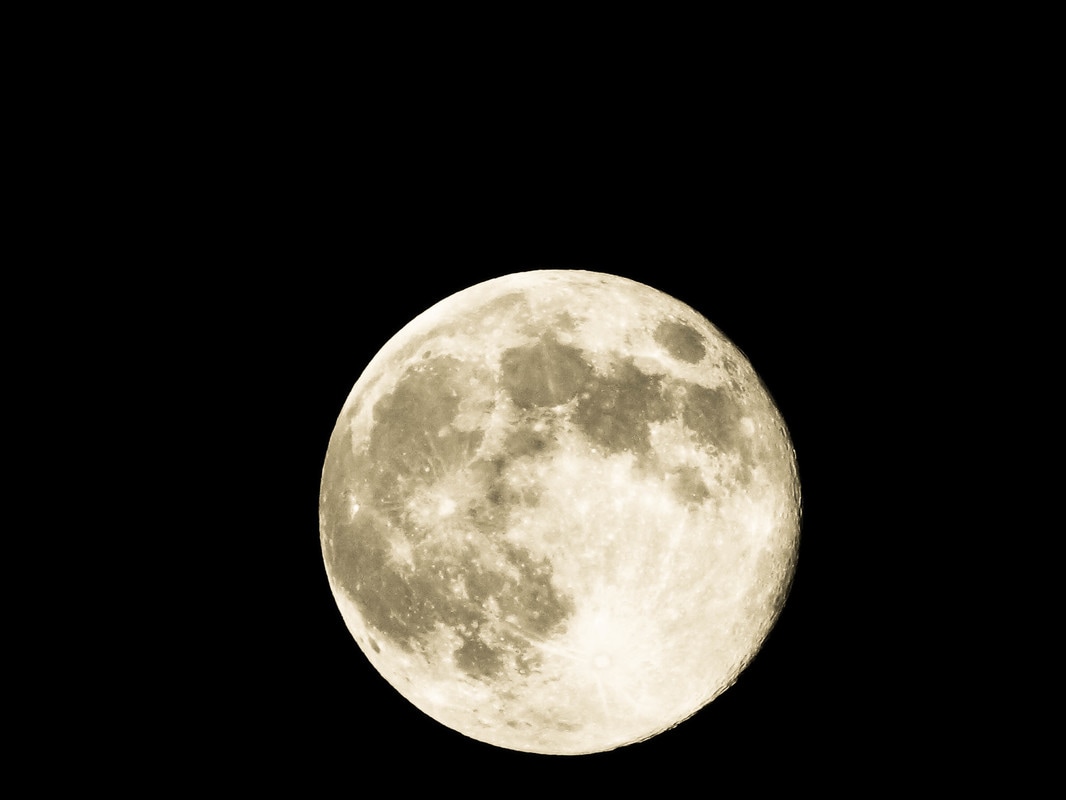
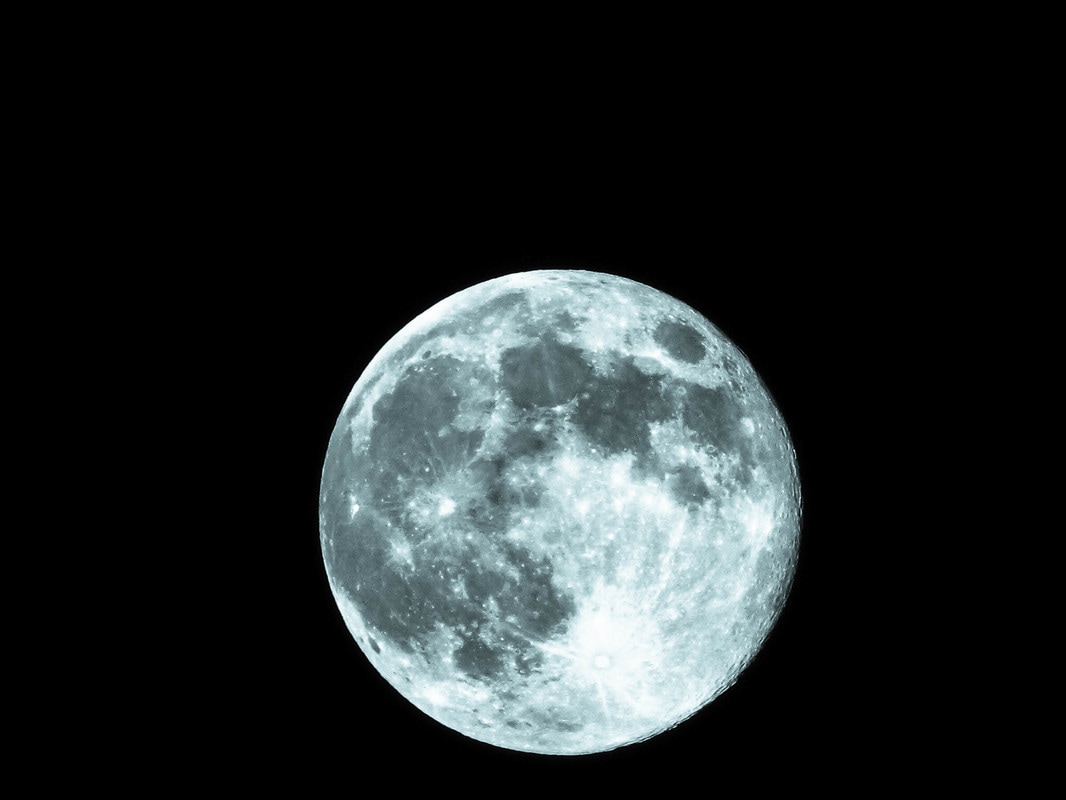
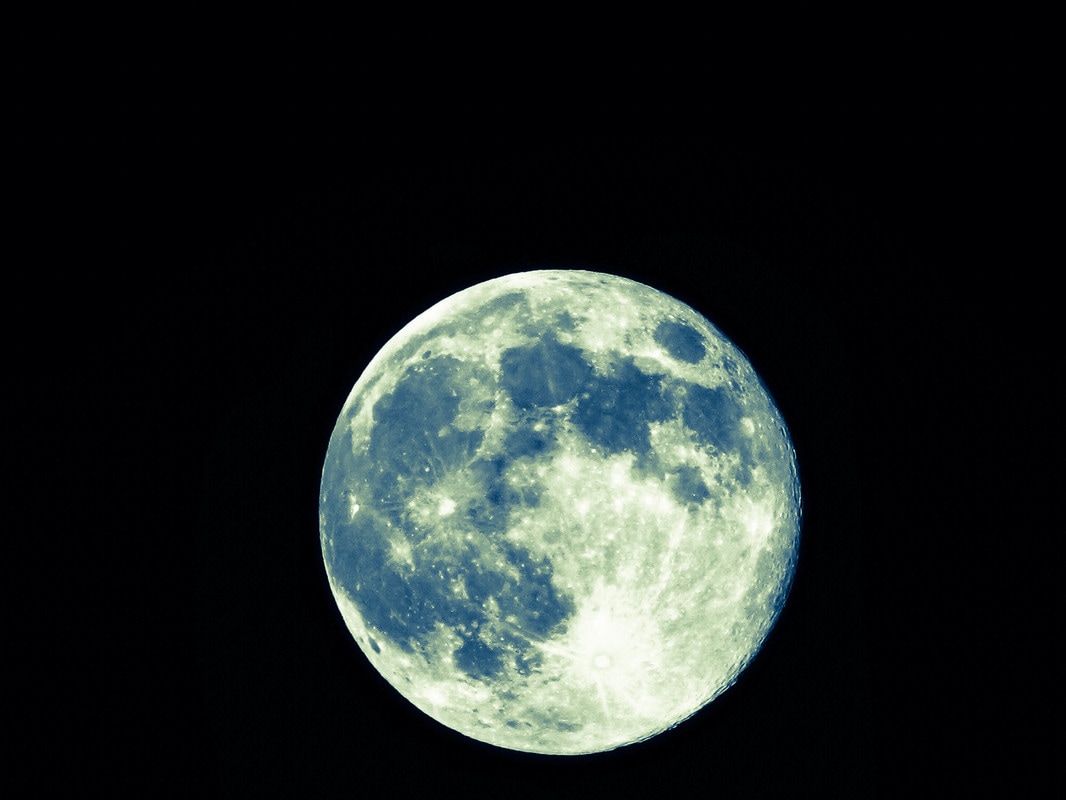
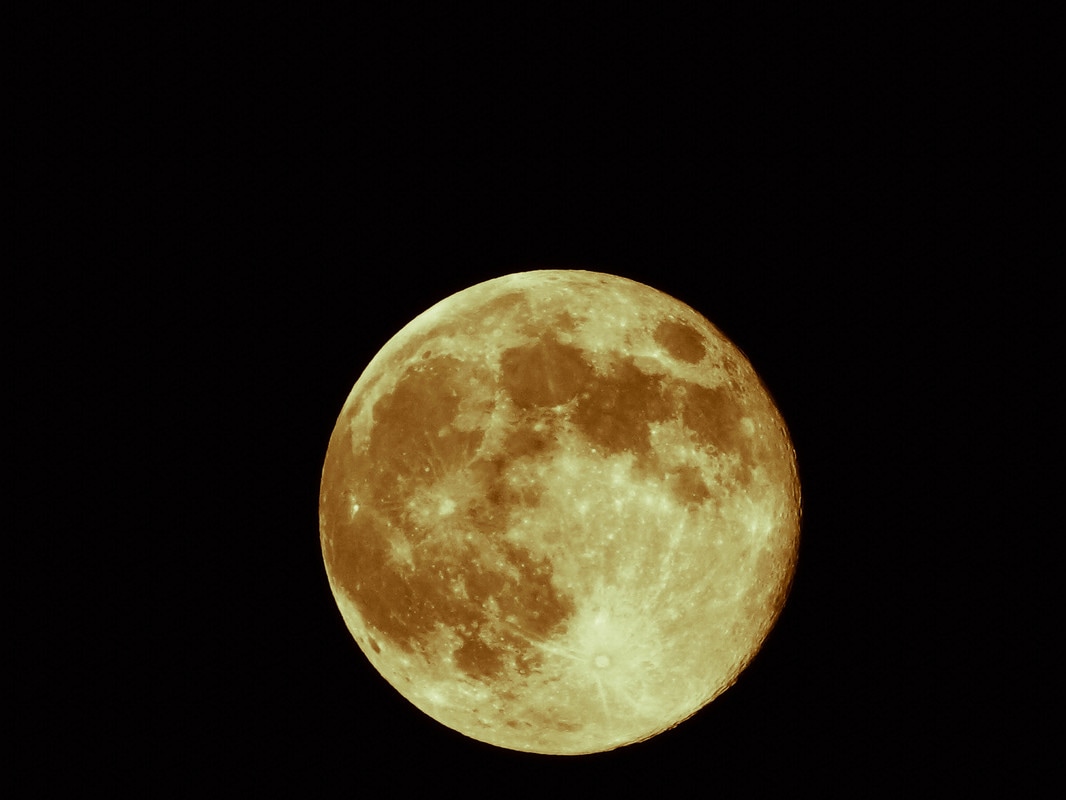
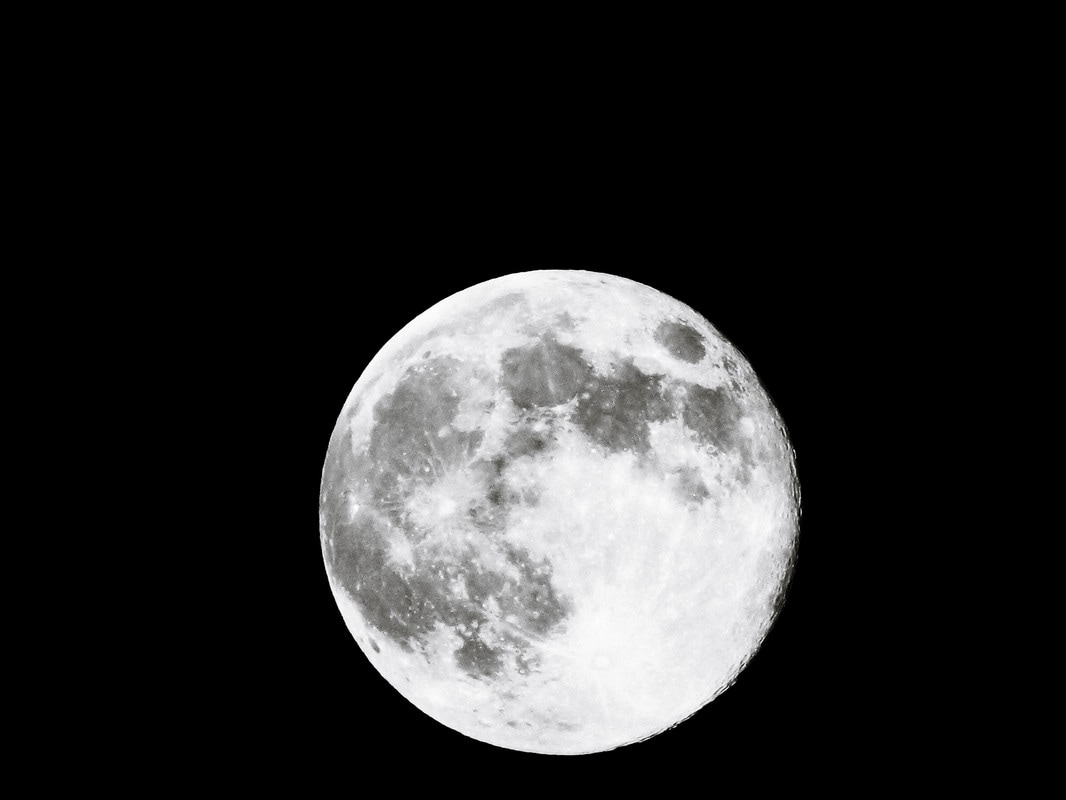
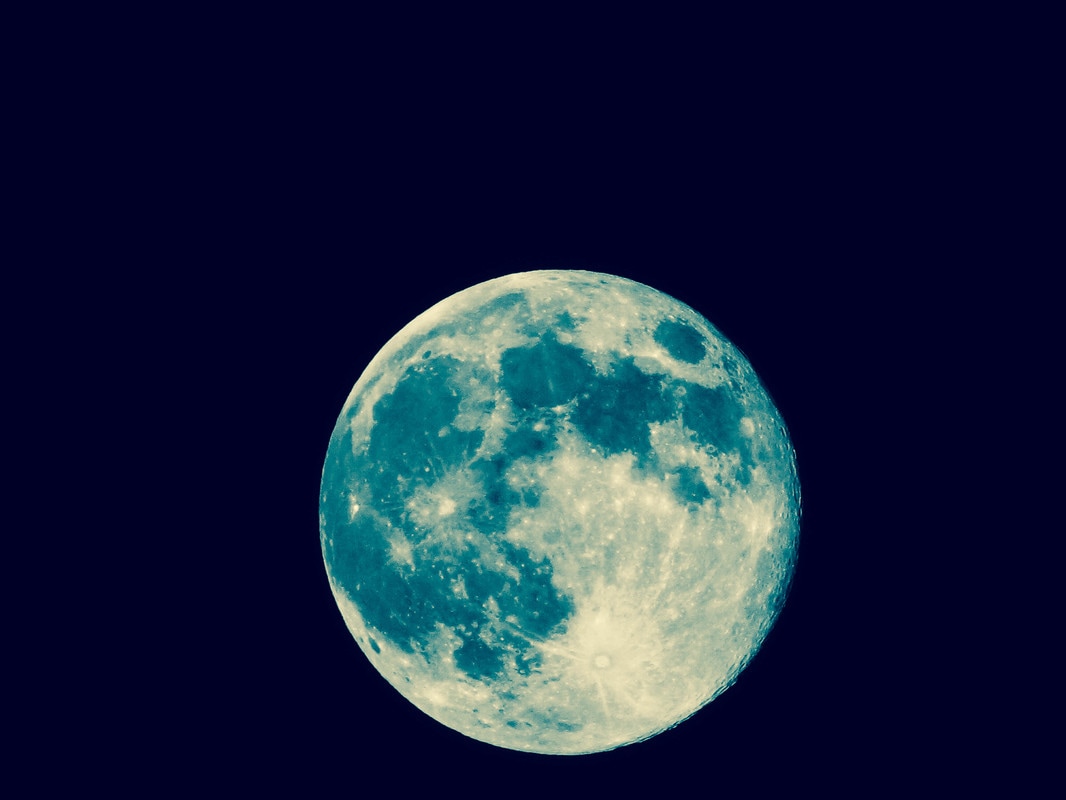
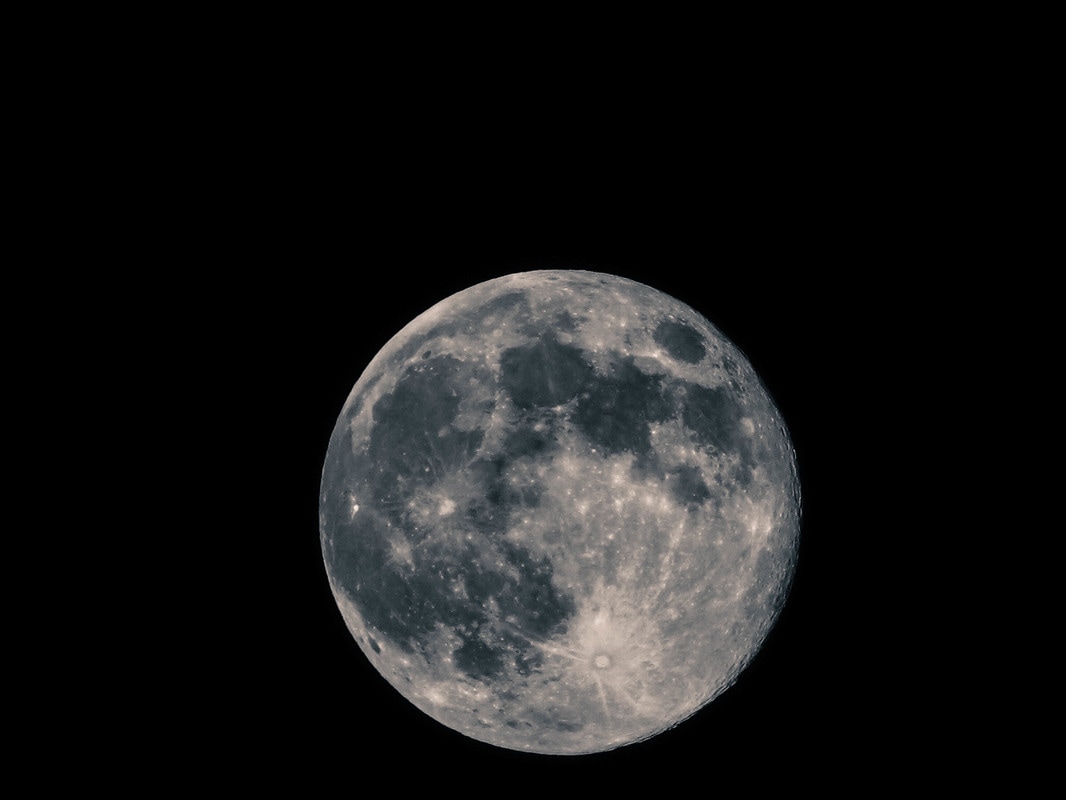
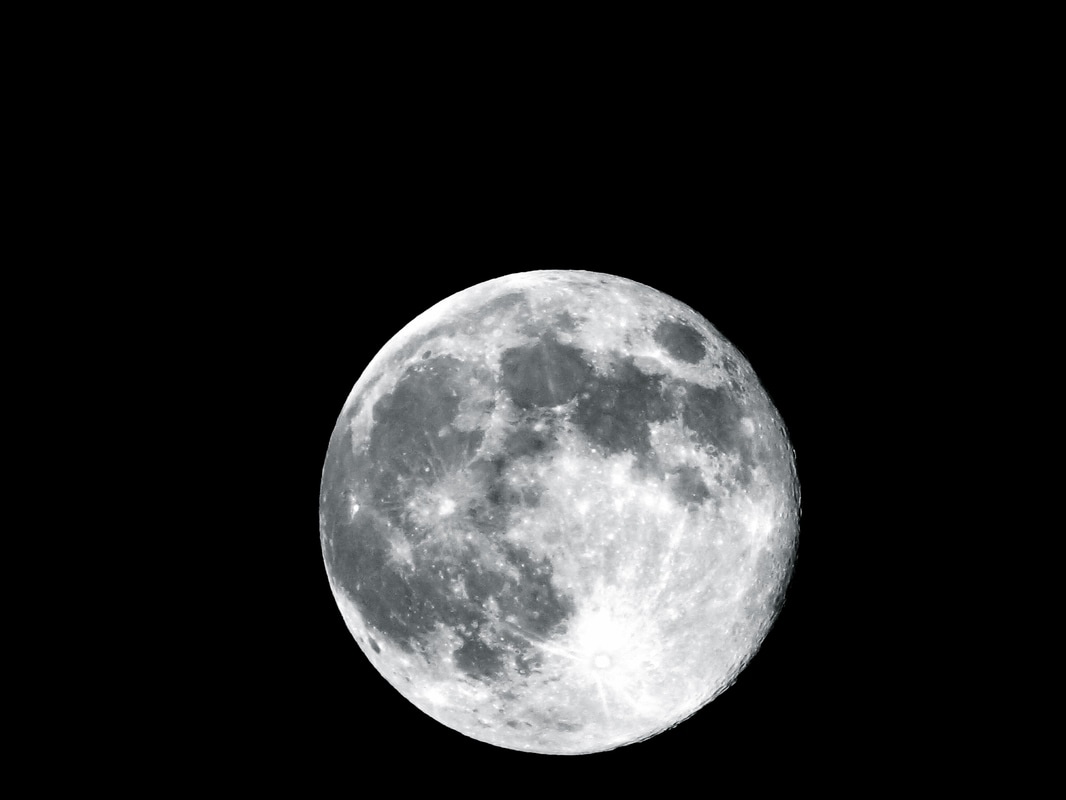 The title of my picture is called The Satellite, because the moon is often seen as the satellite of the universe surrounding us. The moon is the natural satellite of the Earth and reflects the light of the sun back to Earth in the night. It acts as a light for us when in the dark. This photo however has a more significant meaning than one would think. Many people go through dark times without a light to guide them. Having the moon guide us in the dark of the night ensures that we will be able to see the light of the next day. This photo was taken in the front yard of my house around 7:45 P.M. I took this photo free handed with my Canon Power Shot SX40 HS camera. I cropped part of it, to make the main focus (the moon) more prominent. I edited the photo in Adobe Photoshop, changing the brightness and contrast of my photo. My photo is within the division of monochrome images, due to it consisting of a single color (white of the moon) against a neutral background (black of space). My photo was printed on Epson Glossy Photo Paper on the Epson P800 digital printer.
Black and White Toned Presets
Color Presets
 I did the song Electric Love by BORNS as my inspiration for this composite photograph. First I distorted the flower background picture so that it appeared to be in the jar. Then created a layer with each of the lightning bolts. I had to erase the backgrounds of each bolt to purely just get the bolt. Then I added myself as a layer mask. I tried to angle myself so it looks like I was holding onto the jar. I had to erase to background of my photo so it appears that it was just me in the jar. From there I added the layer of the electric heart. I lightened the color so it wouldn't stand out too much. Then I merged all my layers together and duplicated my photo. With the duplicated photo I made it black and white. From there I used to the ruler tool and split the photo in half an erased the bottom half so that it was in color. I also typed the words "Electric Love" and used the 3d effect to make it appear more prominent in the photo.
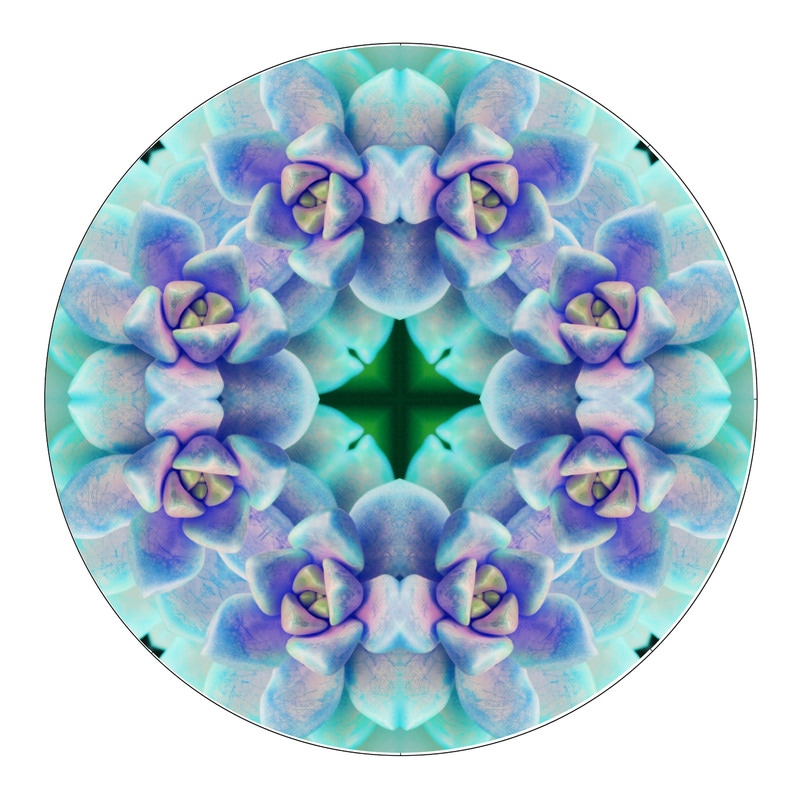
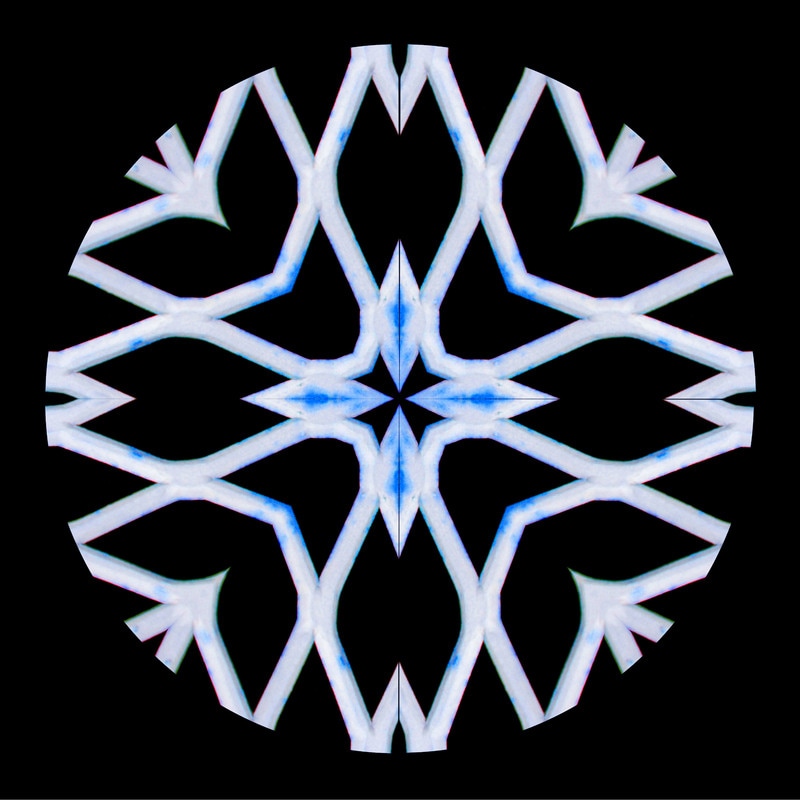
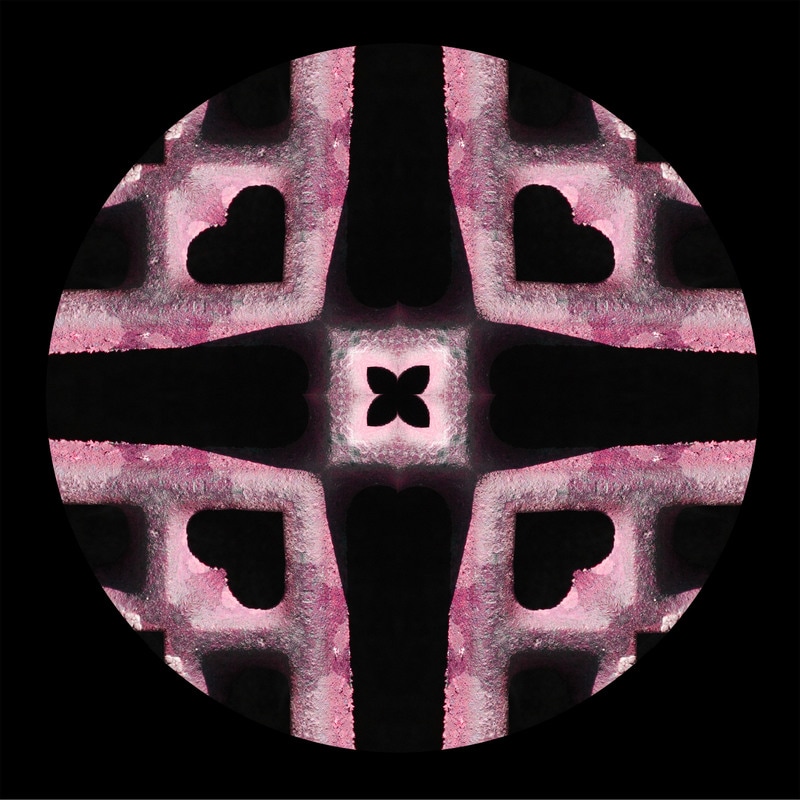
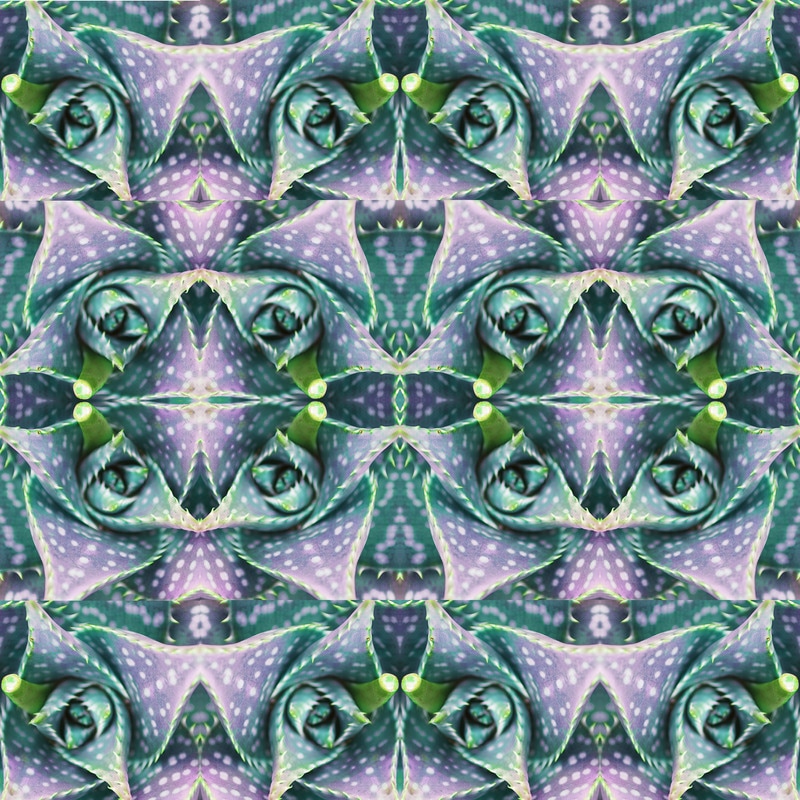
1. A mandala to me, is an image in which you crop part of a picture and mirror different ways in order to create one big picture in the shape of a circle. You can also use different backgrounds and colors to make them appear more vibrant.
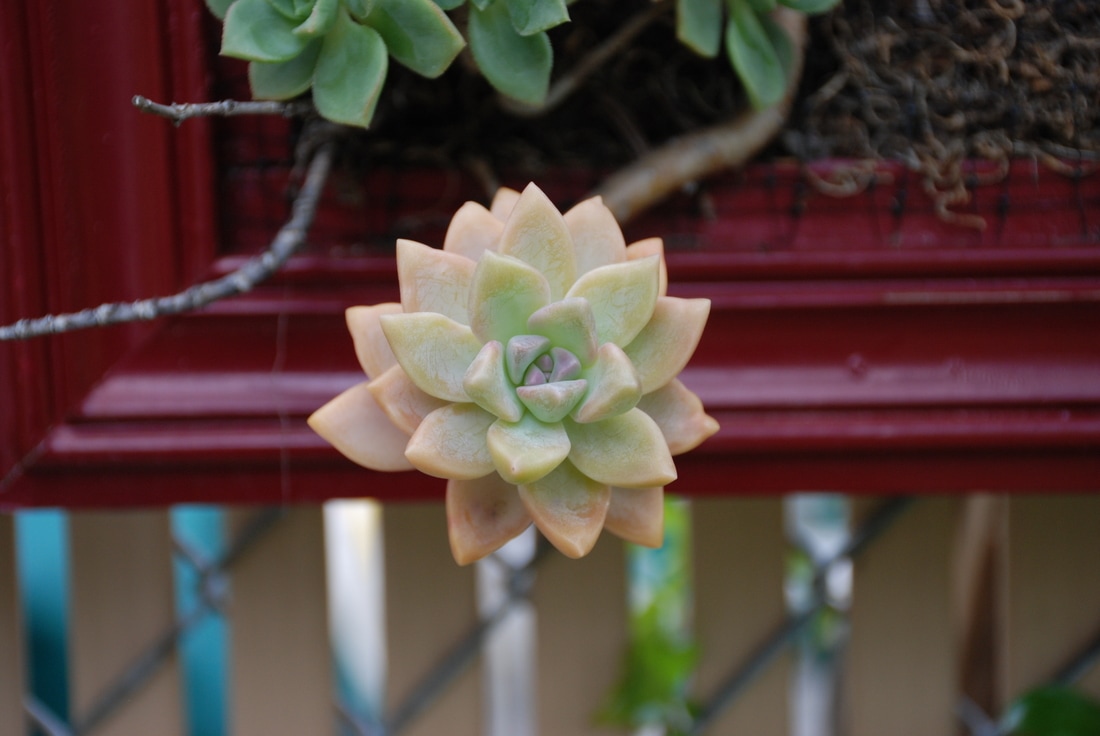
2. To make mandalas, first you take a circle template that is 8 inches and divided into triangles. You use the magic wand tool and select one of the triangles and drag it onto the picture you want to crop. From there you copy and paste the area selected back onto the template. After that you create a new layer and position it so it matches into another triangle. You merge these two layers together to make a 1/4 triangle. Then you duplicate this layer 3 times putting them all into the other 3/4ths of the circle. When done you merge visible. 3. I liked being able to use different colors to make them appear more vibrant and unique. Noe of them look like the original. My favorite is the one in which I used a succulent. The color choice made it appear more happy and glowing. 4. I struggled with being able to match the layers exactly so that no lines shone through. 5. I would take my time more in order to get them symmetric. |
Clare HoffmanArchives
May 2017
Categories |


 RSS Feed
